
Posted
in Tutorials/Steps
Tags: 3D


Mallen till rosen hittar du under mallar.
The template for the rose you can find in templates for free.

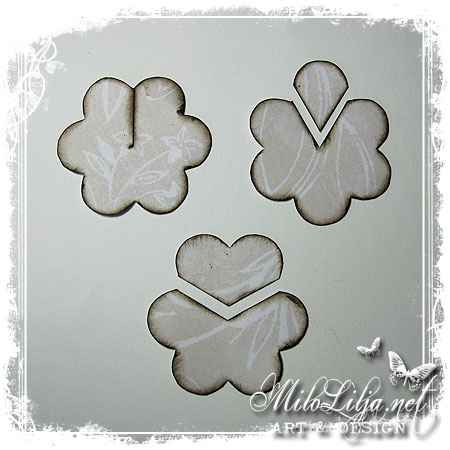
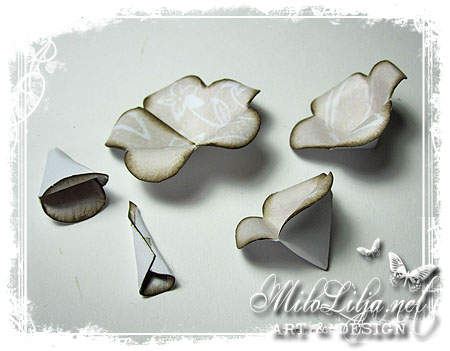
Man behöver tre stycken såna här blommor och så klipper man dem
så som bilden visar. Jag har chalkat dem runt kanterna så det ska
synas tydligt, och så är det ju snyggt oxå…
You need three flowers like the ones on the picture and then you cut
them apart like the picture shows. I’ve used chalk around the edges so
you can see it better, and it also looks great…
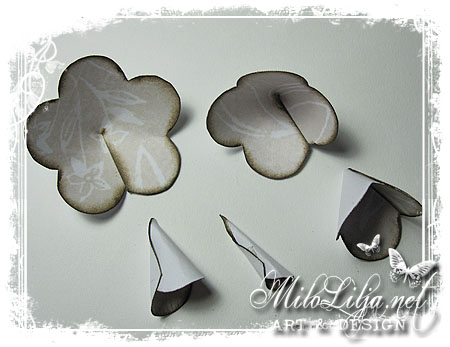
De tre största delarna limmar man eller tejpar med dubbelhäftande tejp
så ett blad ligger omlott med ett annat. Räkna bladen på den här bilden
och den förra så förstår du lättare. De två små sätter man ihop i kanten,
de sitter nästan bäst med lite dubbelhäftande tejp.
Add glue or double adhesive tape on the three biggest pieces so that
two of rose paddles becomes one. Count the paddles on this picture and
the picture before. The two small pieces you put together at the edges,
it sticks better if you use double adhesive tape.
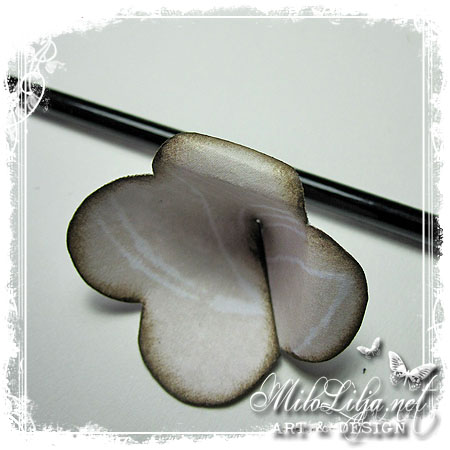
Ta sen en pensel eller liknande och rulla alla kanter lite.
Take a pencil or something tin and roll all the edges a little.
Här ser ni hur jag har rullat alla delar.
Here you can see how it looks when I’ve rolled all the pieces.

Sen klipper man av den spetsiga delen på alla delar utom den största.
Klipp lite i taget, och passa in alla delar i varandra, den största i
botten och sen i storleksordning till den minsta sist.
Then you cut of the tip at all the pieces beside the biggest one.
Cut a little bit at a time, and piece them together. The biggest one
should be in the bottom and the smallest one at the top.
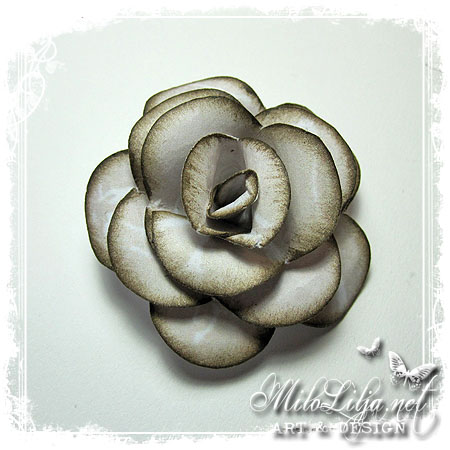
När du känner att alla delar passar i storlek efter att du har klippt,
så kan du limma ihop dem. Tadaaa! Så har du en ros. För att få rosen
lite plattare i botten – NÄR DEN HAR TORKAT – så brukar jag fila ner
den lite med en nagelfil. Då är det lättare att få den att fastna där
man sätter den, och den står inte upp lika mycket.
When you feel like all the pieces match you can glue them all together.
Tadaaa! Now you’ve made a rose. To make the rose a little more flat
– WAIT UNTIL IT’S DRY – and use a nail polish tool and polish the tip a
little. It makes it easier to make it stick.

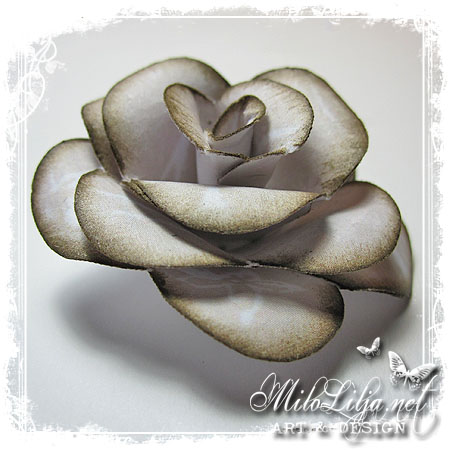
Här har jag dekorerat min ros lite med små blingstenar och glitterlim
runt kanterna. Det är ju bara fantasin som sätter stopp!
Here you can see that I’ve decorated my rose with some bling and
stickles around the edges. Use your imagination!


🙂 you’re welcome! Yes it’s very simple. I think it’s a little bit too big but it works.
Hugs