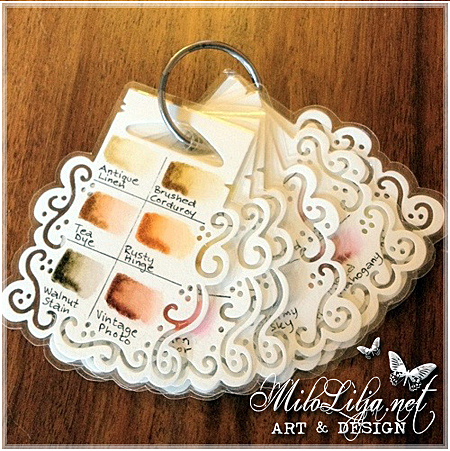
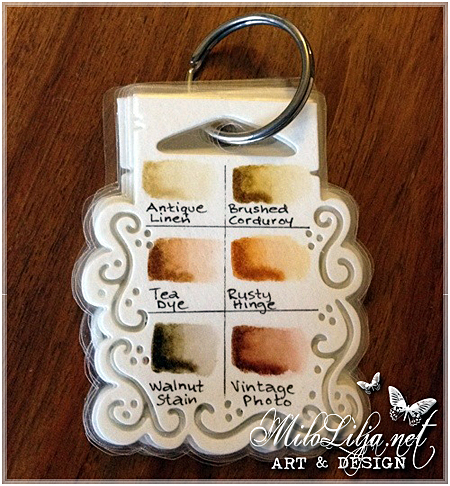
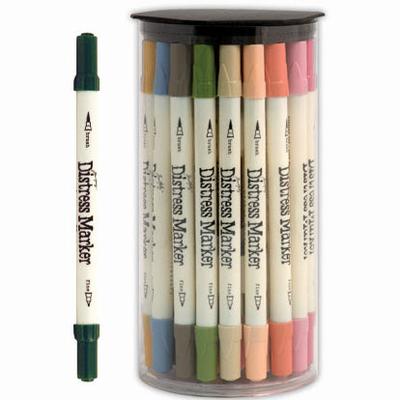
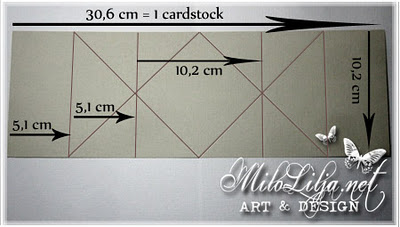
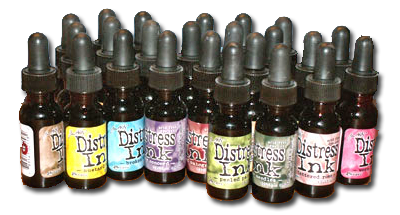
Distressfärgerna kan man köpa både i stämpeldynor och i refillflaskor.
Jag har valt att köpa alla färgerna i flaskor, så jag kan droppa några
droppar i små fack så det är enkelt att använda dem när jag målar.
Om du har dynorna, kan du trycka av dem på ett plastlock, eller ett
laminerat ark förslagsvis med färgen stämplad under laminatet.

You can buy the distress inks both as stamp pads and refill bottles.
I’ve chosen to buy all colors as bottles, then I just drip some ink
in small cases. It makes it easier to use them when I paint.
If you just have the stamp pads, you can press them to a plastic cover,
or laminate a paper with the color stamped under the laminate.
D I S T R E S S F Ä R G E R N A:
-Vattenlösliga
-Otroligt dryga, en droppe färg räcker jättelänge.
-Man kan blanda färgerna till nya nyanser.
-De är lätta att skugga med
-De går att få i olika nyanser beroende på vattenmängd
D I S T R E S S I N K S:
-Water-based
-Really economical, one drip is enough for a long time
-Easy to mix the colors to new shades.
-It´s easy to paint shadows
-Use one color in many shades depending on the water.
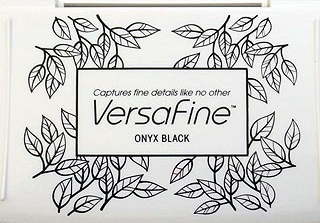
När jag stämplar mina motiv på akvarellpapper
använder jag Versa Fine Onyx Black som är vattenfast.
When I stamps my rubber stamps at watercolor paper
I use Versa Fine Onyx Black because it´s water proof.
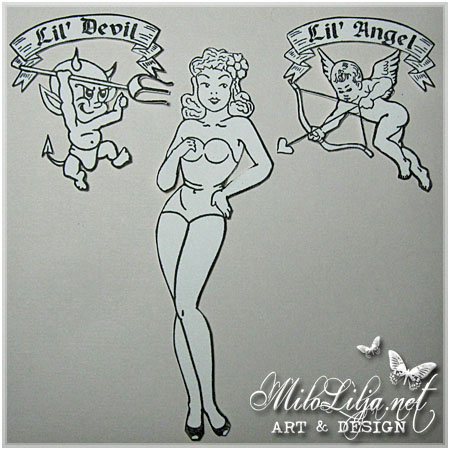
Jag klipper ut alla mina motiv till 99% för jag gillar att göra
scener med många olika motiv på samma kort. Och jag klipper
alltid ut motivet FÖRE jag målar, så jag slipper att få en
vit kant från saxen runt motivet.
I cut out about 99% of my motives because I like to make
scenes with a lot of different motives at the same card.
And I always cut them out BEFORE I paint, so I don´t get
a white edge from the scissor around the motive.

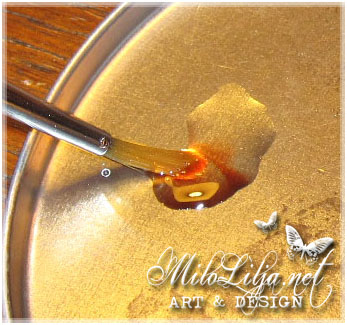
Jag blandar ytterst lite färg med vatten så jag får rätt nyans.
Jag brukar ha ett kaffefilter under motivet så jag kan
provmåla/dra av lite av färgen/vattnet, så det inte blir så blött.
I mix very little color with water until I get the shade I want.
I will have a coffee filter under my motive, so there is easy
to try the colors shade or just loose some of the color/water.

Jag börjar alltid med den ljusaste färgen, och om jag använder
rött, så är det den sista färgen jag målar. Först lägger jag
ett ljust lager över hela det valda området. Jag blandar
färgerna “Tattered Rose” och “Antique Linen” som hudfärg.
I always start with the lightest color, and if I use red, that is the
last color I paint with. First I paint a light layer all over
the chosen area. I mix the colors “Tattered Rose” and
“Antique Linen” as skin color.
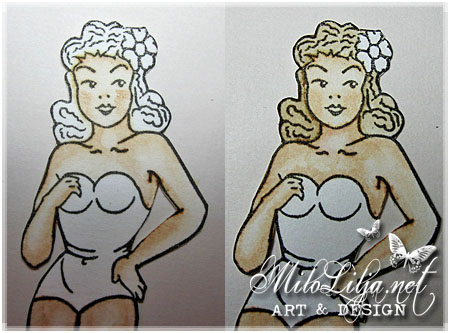
När jag är klar med det första ljusa lagret, så målar jag med mer färg
ute vid linjernas kanter. Jag suddar med en ljusare nyans, eller bara
vatten, för att det inte ska bli en skarp kant på skuggan.
Använd inte för mycket vatten!!!
After the first plain layer with color, I have more color out at
the edge of the lines. I rub out with a light color or just some water
not to make the egde on the shadow so sharp.
Do not use to much water!!!
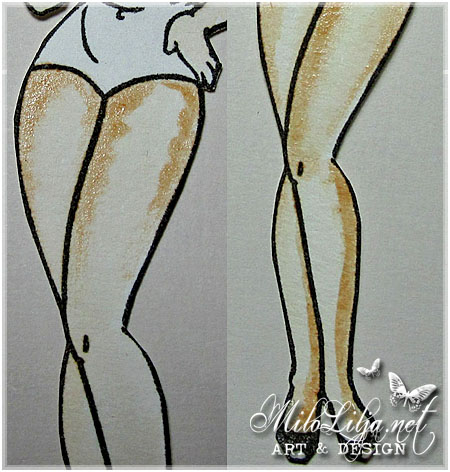
Du behöver måla ganska snabbt innan det torkar, annars blir
det svårare att få bort den skarpa kanten. Om du ändå får en
skarp kant, så försök att måla med lite mer färg in mot mitten
på motivet, tills den skarpa kanten är borta.
Prova dig fram. Jag har provat sen 1996…
You have to be pretty fast or the paint will dry and it will
get more difficult to get the sharp edge away. If you get a sharp
edge anyway, try to take a little more color and make the shadow a
little bit closer to the middle until the sharp edge disappears.
Trial and error! I´ve been trying since 1996…
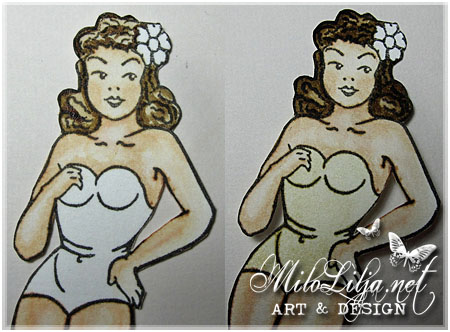
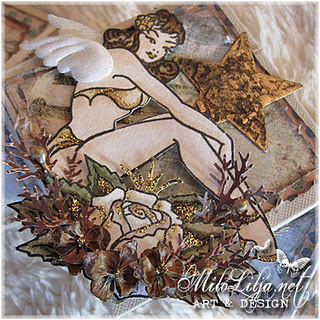
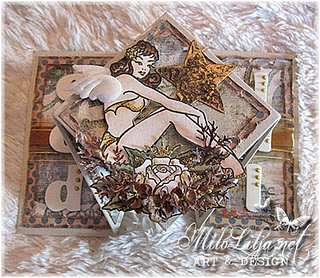
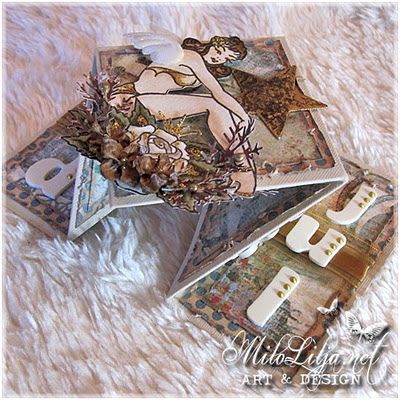
Sen gör du på samma sätt med håret och resten av motivet.
And do as the same way with the hair, and the rest of the motive.
Jag målar jättemånga lager, och fyller på med mer färg, och mer… och mer…
När jag är nöjd med skuggningen, så brukar jag ibland använda mig av
en annan färg i skuggan, som du kan se i hennes kläder.
I paint lots of layers, and fill in with more color, and more… and more…
And when I´m satisfied with the shadows, I sometimes use another color
in the shadows, as you can see in her clothes.
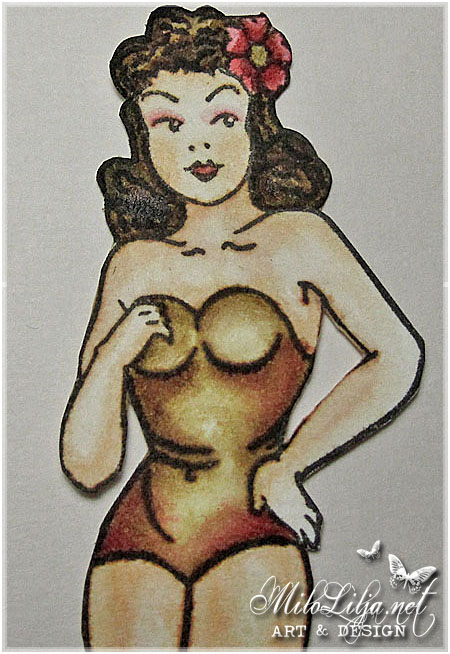
Jag gav henne lite ögonskugga.
I gave her some eye shadow.

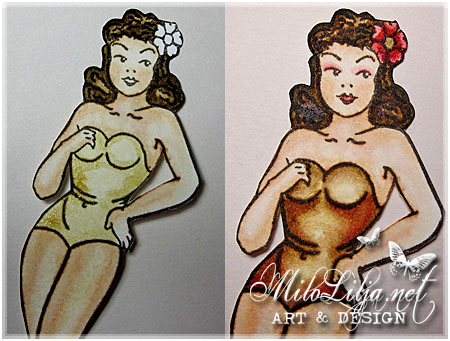
Vänster: Färdig
Höger: Här har jag målat lite vita streck som
gör att det blir lite mer levande.
Left: Done without white highlights…
Right: With some white highlights… and dots at her cheeks.
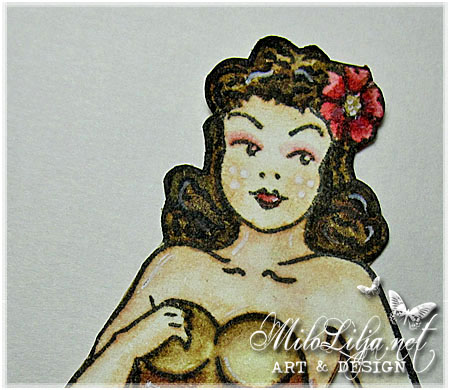
Close up
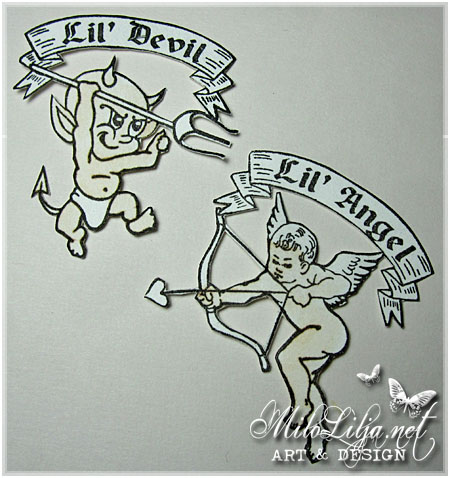
Samma procedur med dessa två…
The same procedure with this two…

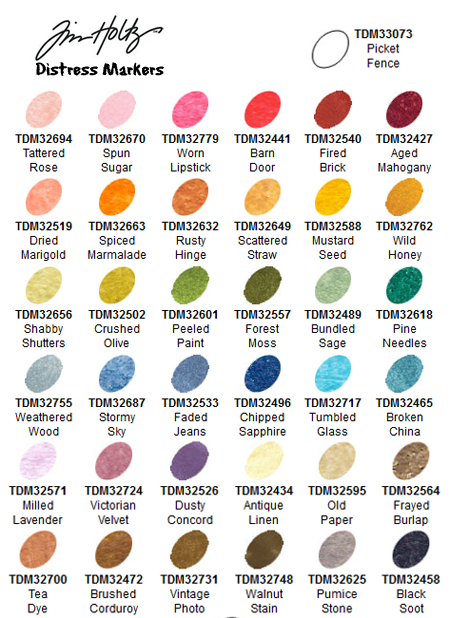
Paint with Distress Markers.
Color map for Distress colors/Markers.
 Be the first to like.